Important Tips For Painting Kitchen Cabinets
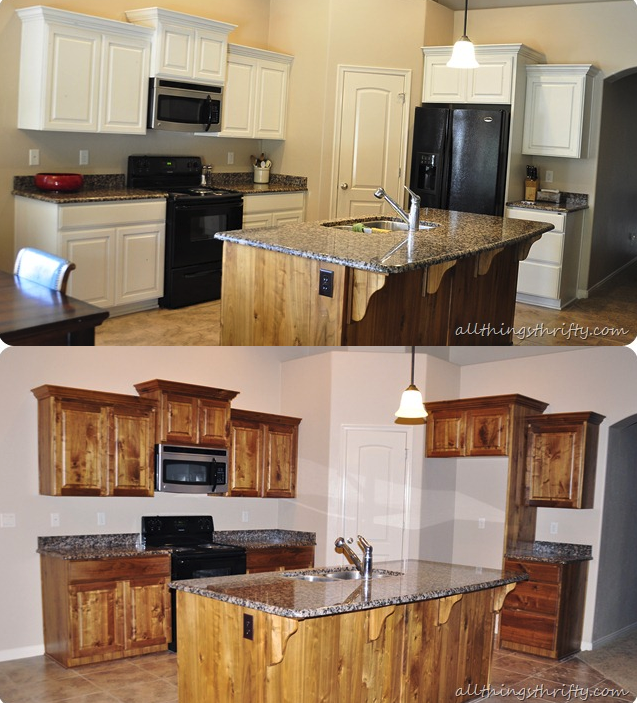
The kitchen is the center gathering point when you have a gathering. Keeping your kitchen cabinets looking beautiful is a design essential for discerning homeowners. Extending the life of your existing kitchen cabinets is a lot easier than replacing them. Painting your kitchen cabinets gives your kitchen a bold new character.
Just be prepare as painting your kitchen cabinets is no small undertaking. This is why planning and prep is so important. Read through these tips to make sure you get the job done correctly the first time.
Find the right paint
Standard wall paint consists of a formula not suited for surfaces like cabinetry. It’s known to chip and it won’t stand up well to repeated cleaning. Instead, choose an alkyd enamel, like Sherwin-Williams ProClassic or Benjamin Moore ADVANCE. It holds up better and since the formulas are self-leveling it will leave you with a smoother finish.
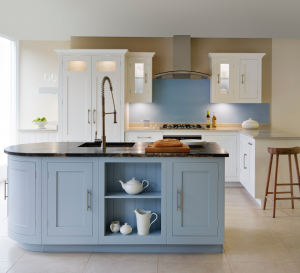
Enrich your cabinets with color
When considering new color for your cabinets, look to materials like the countertop, backsplash, fixtures, and flooring. Let these color cues inspire new color for your cabinets. You can select just a portion of your cabinetry to highlight with a deeper color, while balancing the combination with more classic kitchen hues like off-white or putty.
Remove all of the hardware
Remove all of the hinges and every last screw. It takes time, but it’s worth it to have a clean slate when you begin refinishing the surfaces.
Organize the hardware
One of the best tips I came across was to label each door by number beneath where the hinge goes in the frame. Label a plastic baggie filled with that door’s hardware with the same number. Place a small piece of painter’s tape over the number on the door, so when the painting is complete, you can remove the painter’s tape and see the number. The small place where you had written the number should be inconspicuous enough not to be seen (ideally, it will be hidden behind the hinge hardware).
Pack up your kitchen cabinets
Pack paper bags or plastic bins for each individual “pantry-like” cabinet, so that the contents can be easily returned to their home when the job is through. Keep the cookware you use most regularly like a fry pan, knife and wooden spoon on your cooktop. Place your silverware in a glass and leave it on your dining room table. You’ll still need them throughout the duration of your project, so best to keep them handy.
Don’t Go Overboard on Sanding
You should sand cabinets before starting your project to give the new paint a good surface to grip. But you don’t need to sand to bare wood. If your cabinets have a factory finish, sand lightly with 120-grit sandpaper or a sanding sponge. If the surface is rough from a previous paint job or poor varnishing job, start with coarser 100-grit paper to remove bumps. Then sand again with 120-grit to get rid of any sanding marks
Time to clean
Cleaning the surface is a must! Remove all of the dust and debris after sanding by wiping the surface with a tack cloth. It will lift all of the dust while containing the mess. Wear some rubber gloves for this part.
Use oil-based primer
Kilz is recommended by painting pros. With the oil-based formula, the hardwood is less likely to discolor painted white cabinets over time (wood is known to “bleed through” and give the paint a tinge of yellow, especially if it’s knotty wood). The oil-based also creates a very well-adhered surface on which to paint.
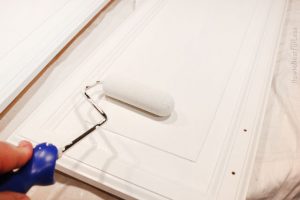
Perfect rollers
High-density foam rollers are best for the application of the oil-based primer. For rolling the paint itself, choose the Purdy 1/4″ low-nap “mirror finish” roller specified for clears and enamels. Use plastic baggies to seal your brushes and rollers overnight. This is a good tip if you’re going to work a few days in a row. Seal them up and the paint will stay wet on the bristles, ready for the next day’s work.
Follow the grain
If you’re painting frame-and-panel doors, follow the direction of the wood grain with your finishing brushstrokes. The vertical stiles should receive the last brush strokes running from top to bottom.
Add a polyurethane topcoat
The extra coat finishes off the surface and creates a barrier for the paint finish to protect it from wear and tear. Use either a high-density foam roller or an “enamels and clears” low-nap roller to apply evenly.
Don’t forget the upper cabinets!
Don’t overlook the insides of your cabinets, especially the upper cabinets, which you’ll be looking into every time you open the doors.
Reinstalling
When reinstalling, attach the hardware to the door first and then install the door to the cabinet. Also, have an extra set of hands when you install upper cabinet doors to make it easier when balancing and working over your head.
In the end, all your hard work will be worth it!
I found some blog posts with step by step instructions on how to paint your cabinets that I wanted to share. Click on the links below to visit them:
https://placeofmytaste.com/paint-kitchen-cabinets/
https://www.allthingsthrifty.com/how-to-paint-your-kitchen-cabinets/
http://www.theprairiehomestead.com/2013/03/how-to-paint-your-kitchen-cabinets.html